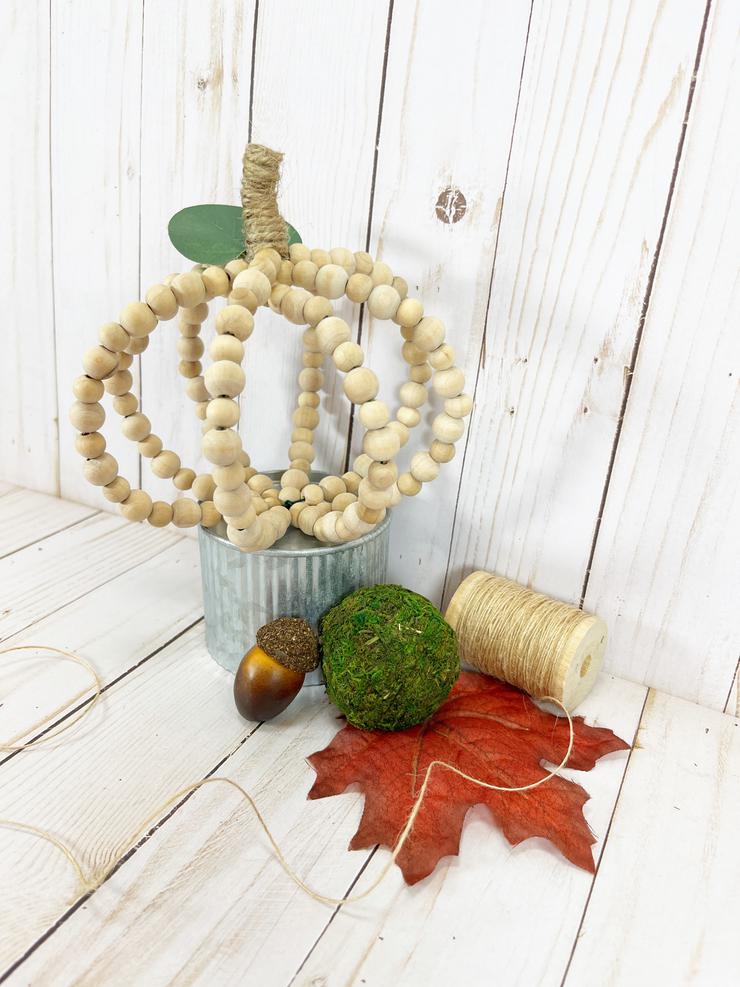
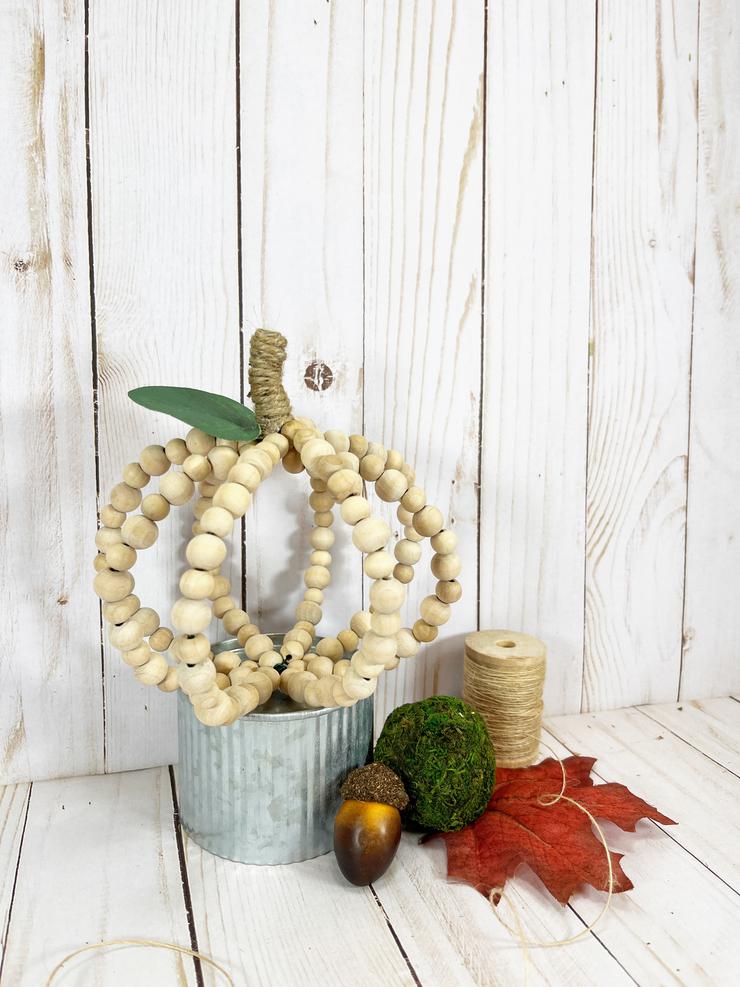
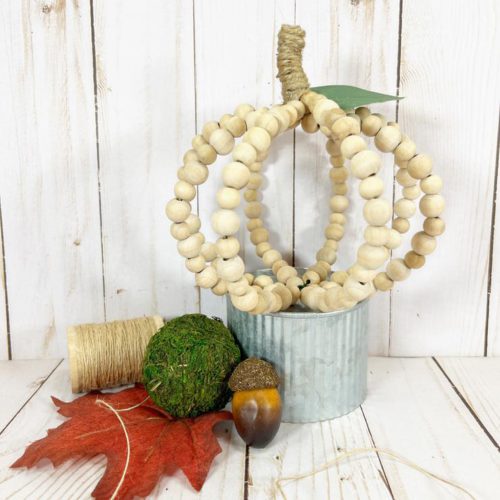
DIY Dollar Tree Wooden Bead Pumpkins

Check out these cute DIY Dollar Tree farmhouse wooden bead pumpkins.
Easy DIY Dollar Store Fall craft projects for adorable farmhouse pumpkins.
Simple wire wooden beaded pumpkins made with Dollar Store products.
Fun DIY Dollar Tree pumpkin decor to make your home look amazing.
If you are looking for cheap Fall decor for your home this is the Dollar Tree craft project for you.
Give your home that farmhouse look this Fall and Halloween season with wooden beaded pumpkins.
Get ready to make the best DIY Dollar Tree farmhouse wooden bead pumpkins.

![]()
Check out these other
DIY Dollar Tree Farmhouse Crafts
DIY Dollar Store Farmhouse Decoration Ideas & Hacks
DIY Dollar Store Farmhouse Decorations
DIY Dollar Tree Farmhouse Tiered Tray
DIY Dollar Tree Farmhouse Egg Wreath
DIY Dollar Tree Farmhouse Rabbit Topiary
DIY Dollar Tree Farmhouse Wagon
DIY Dollar Tree Farmhouse Cricut Mini Book Stack
DIY Dollar Tree Farmhouse Stacking Tray
DIY Dollar Tree Farmhouse Pottery Barn Vase Dupe
DIY Dollar Tree Farmhouse Craft Stick Wreath
DIY Dollar Tree Farmhouse Barn Wood Doors
DIY Dollar Tree Farmhouse Pottery Barn Footed Bowl Dupe
DIY Dollar Tree Farmhouse Mini Cutting Board
DIY Dollar Tree Farmhouse Cutting Board and Wood Crate
DIY Dollar Tree Farmhouse Pottery Barn Maya Terra Cotta Planter Dupe
DIY Dollar Tree Farmhouse Truck Wheel Wreath
How to Make DIY Dollar Tree Wooden Bead Pumpkins
Gather all supplies.
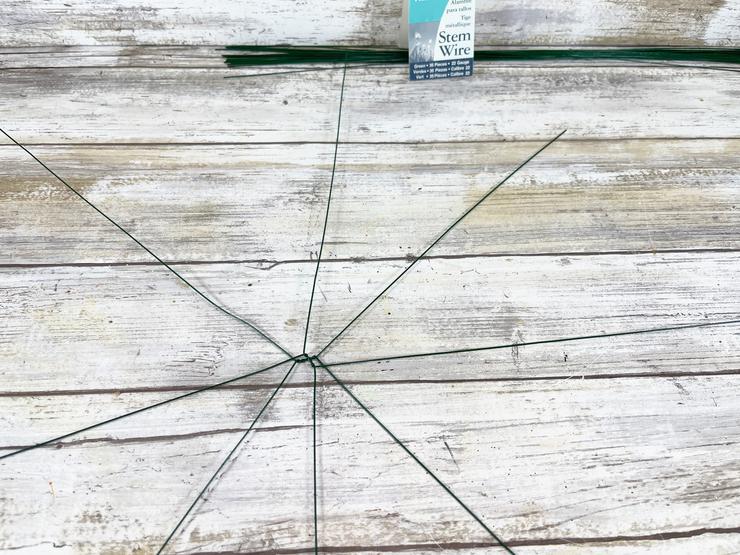
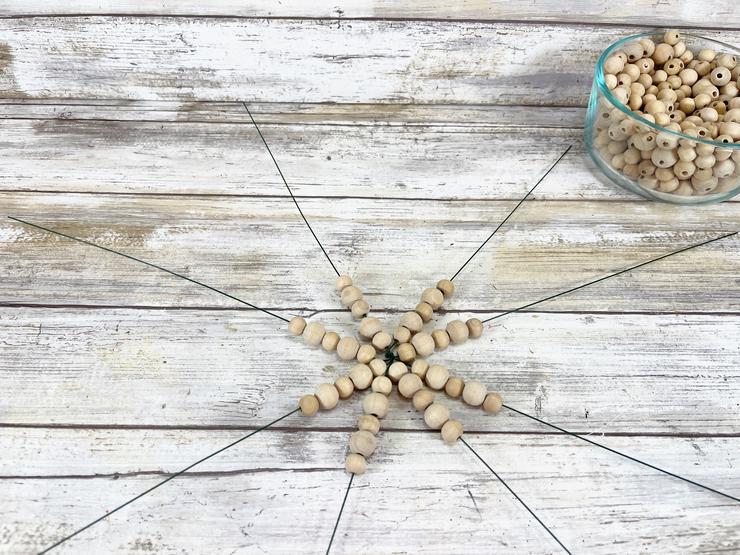
Remove four 18” floral wire stems from the package and twist together several times in the middle to create a star shape with eight pieces.
Use needle nose pliers to pinch the twisted wire together tightly. The wire stems were found in the floral department of the dollar store and are 22 gauge.
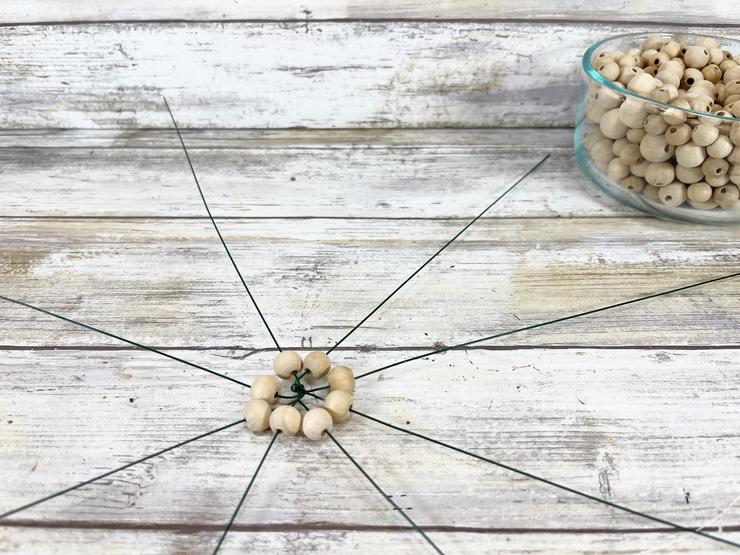
Open two to three packages of assorted wooden beads and place the two largest sizes of beads in a bowl for easy access.
Place eight of the smaller size wooden beads on the eight pieces of wire, moving the beads to the center.
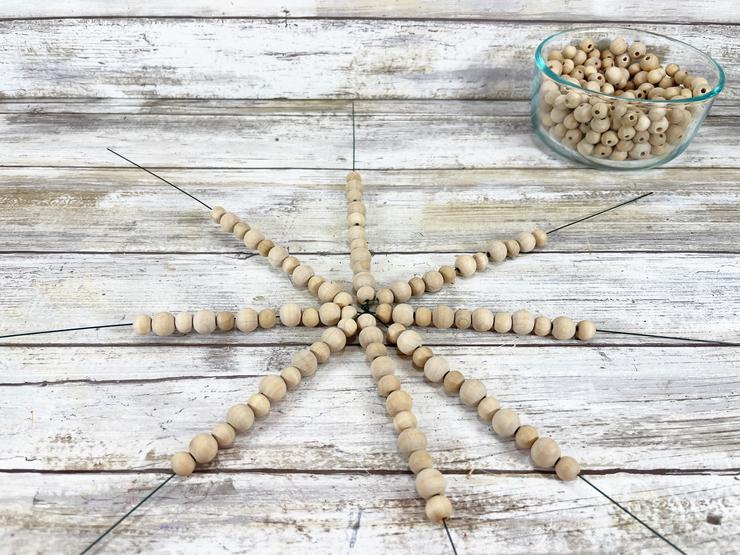
String on additional wooden beads, eight at a time, alternating between small, and large, then small, and large.
Continue stringing on the wooden beads in the small then large pattern until there are 16 beads on each wire, with the last bead being the larger size.
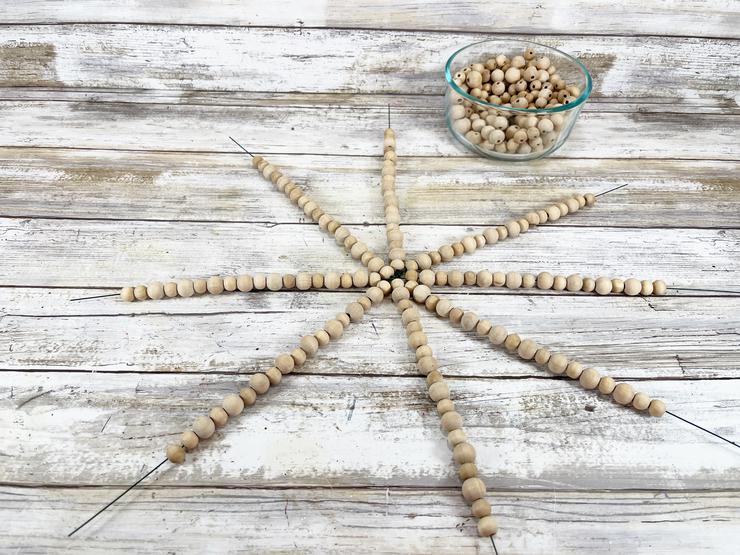
To finish each section of wire, string on two of the smaller beads, so each wire has 18 beads total.
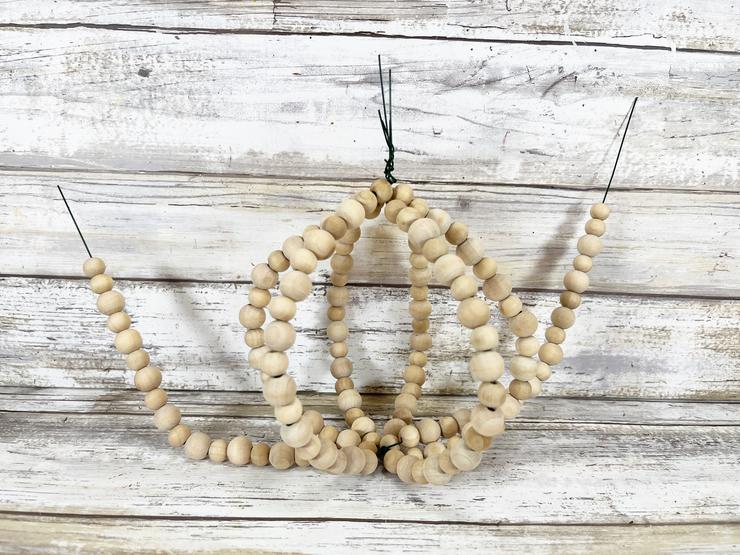
Then carefully bend the excess wire up to keep the beads from falling off.
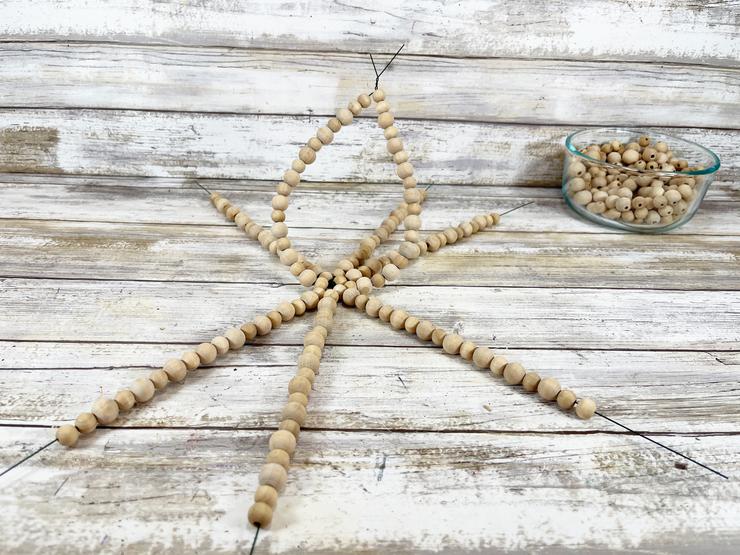
Working with two wires that are opposite from each other, bring them together in a circle and twist the wires together to secure.
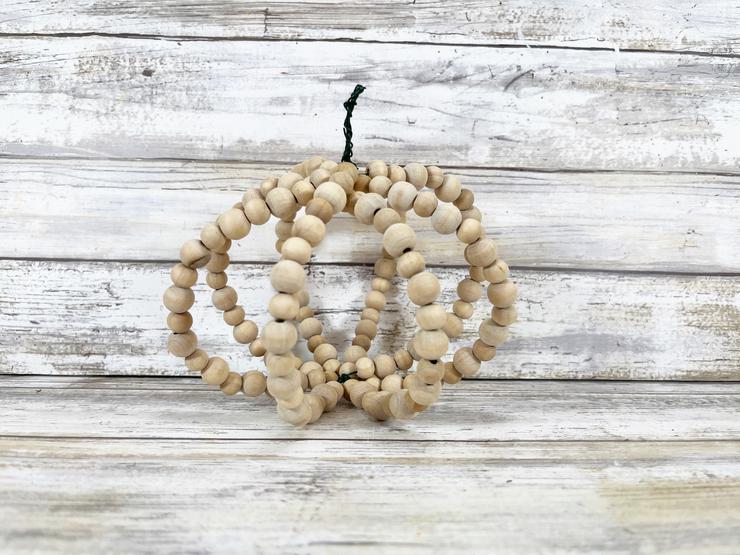
Continue joining and twisting the opposite wires onto the section of exposed wire at the top of the pumpkin until all eight pieces of wire have been secured.
Use the needle nose pliers to tighten the twisted wire and pinch in any sharp ends.
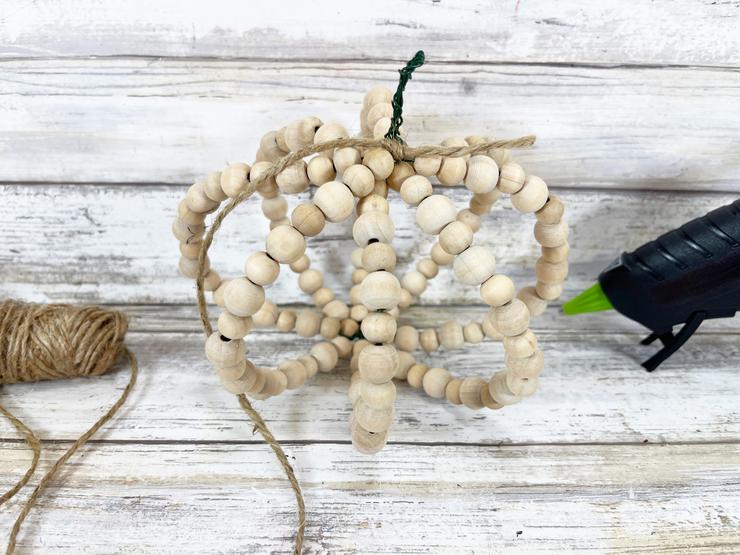
Tie the natural jute twine around the base of the wire stem in a double knot and then trim any long ends with scissors.
Secure the knot with a small dab of hot glue.
Attach the twine around the wire stem with a glue gun and glue sticks. Once the entire stem is covered, carefully apply a second layer of the twine around the stem to give it the proper bulk.
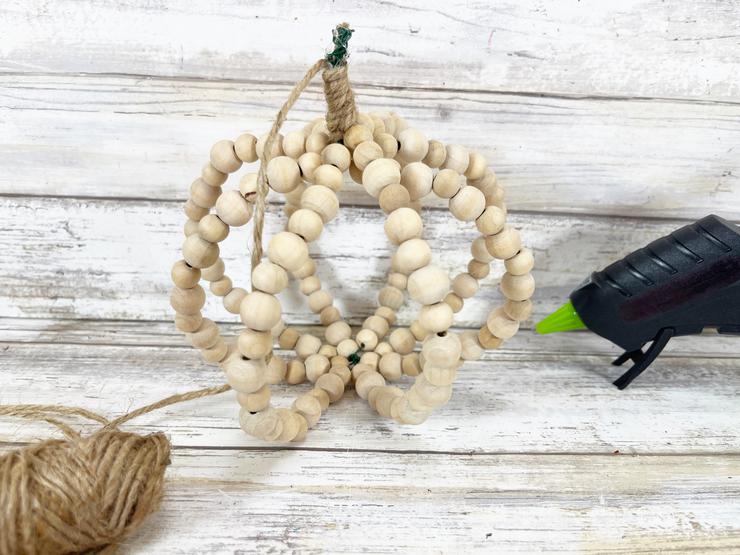
Flip the pumpkin over and secure the cut end of twine under the stem with a dab of hot glue.
Hold the twine in place with the blade of scissors to prevent burning fingers.
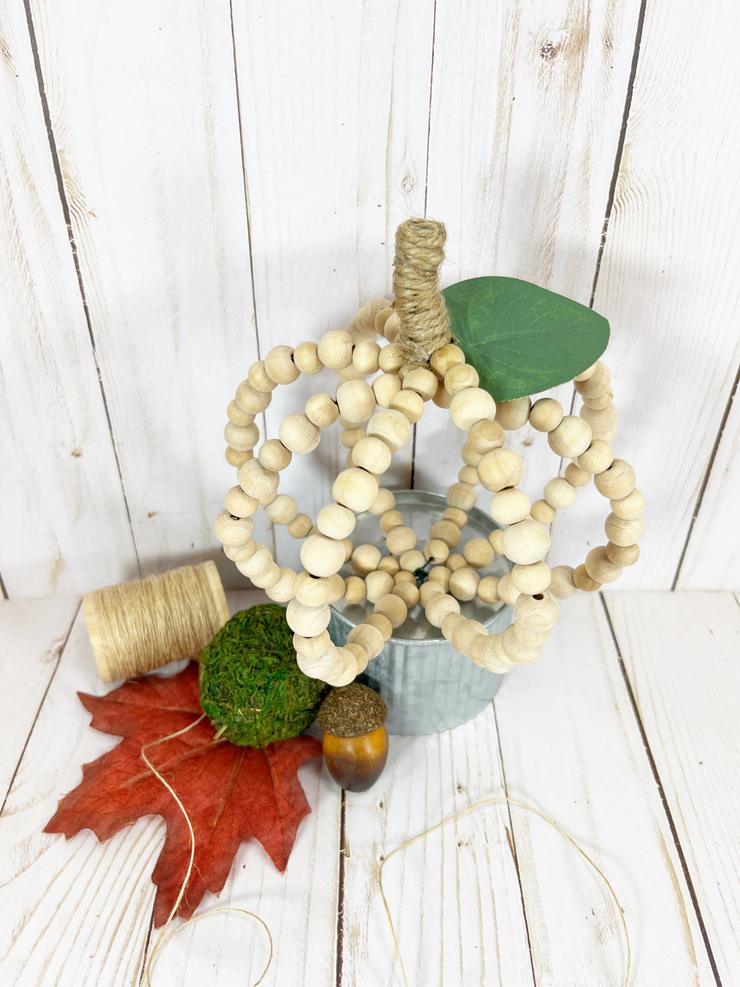
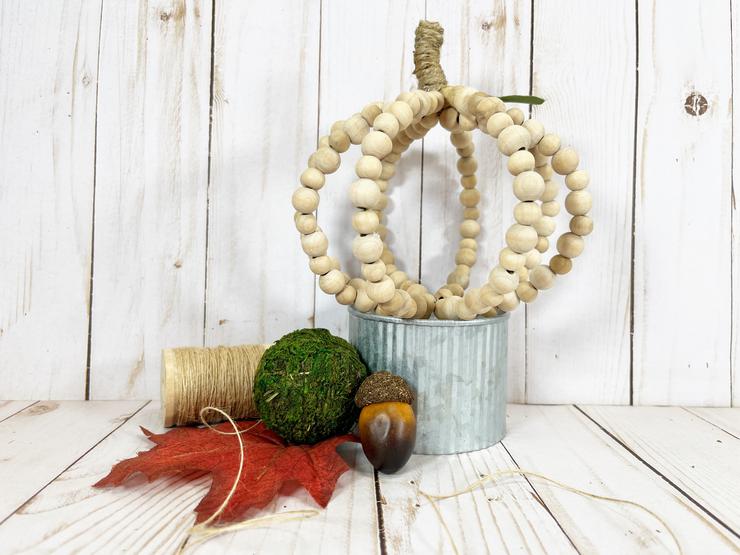
Cut a leaf or two from the silk stem and attach to the top of the pumpkin with a glue gun and glue sticks.
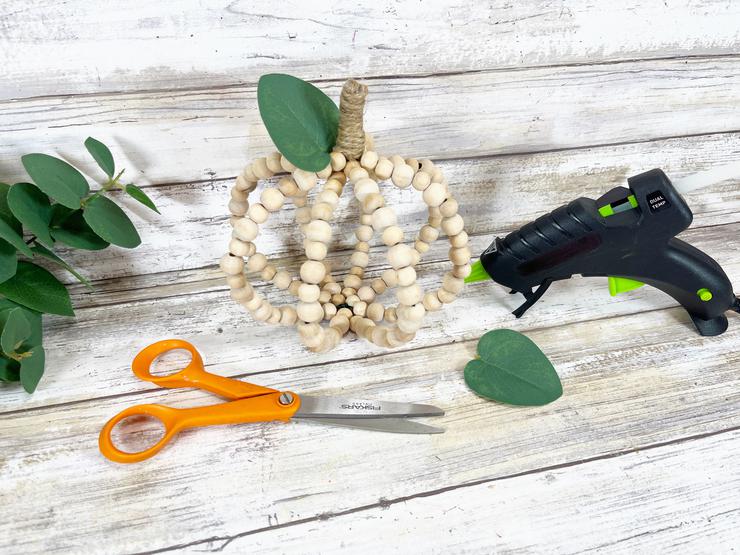
Once everything is completed, carefully shape your pumpkin.
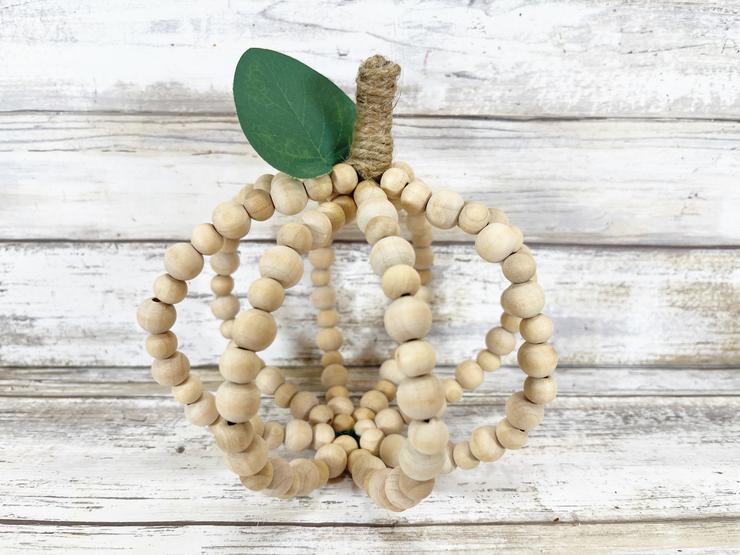
Make it fat and squatty or tall and lean.
Please remember to SHARE on Facebook and PIN IT 📌
📌 FOLLOW ME ON PINTEREST BY CLICKING HERE
DIY Dollar Tree Wooden Bead Pumpkins
Ingredients
- Wooden Beads – Dollar Store
- Floral Wire – Dollar Store
- Natural Jute Twine – Dollar Store
- Silk Leaf Stem – Dollar Store
- Glue Gun and Glue Sticks – Dollar Store
- Needle Nose Pliers
- Scissors
- Ruler
Instructions
- Gather all supplies. Remove four 18” floral wire stems from the package and twist together several times in the middle to create a star shape with eight pieces. Use needle nose pliers to pinch the twisted wire together tightly. The wire stems were found in the floral department of the dollar store and are 22 gauge.
- Open two to three packages of assorted wooden beads and place the two largest sizes of beads in a bowl for easy access. Place eight of the smaller size wooden beads on the eight pieces of wire, moving the beads to the center.
- String on additional wooden beads, eight at a time, alternating between small, and large, then small, and large.
- Continue stringing on the wooden beads in the small then large pattern until there are 16 beads on each wire, with the last bead being the larger size.
- To finish each section of wire, string on two of the smaller beads, so each wire has 18 beads total. Then carefully bend the excess wire up to keep the beads from falling off.
- Working with two wires that are opposite from each other, bring them together in a circle and twist the wires together to secure.
- Continue joining and twisting the opposite wires onto the section of exposed wire at the top of the pumpkin until all eight pieces of wire have been secured. Use the needle nose pliers to tighten the twisted wire and pinch in any sharp ends.
- Tie the natural jute twine around the base of the wire stem in a double knot and then trim any long ends with scissors. Secure the knot with a small dab of hot glue.
- Attach the twine around the wire stem with a glue gun and glue sticks. Once the entire stem is covered, carefully apply a second layer of the twine around the stem to give it the proper bulk. Flip the pumpkin over and secure the cut end of twine under the stem with a dab of hot glue. Hold the twine in place with the blade of scissors to prevent burning fingers.
- Cut a leaf or two from the silk stem and attach to the top of the pumpkin with a glue gun and glue sticks. Once everything is completed, carefully shape your pumpkin. Make it fat and squatty or tall and lean.
Do Not Forget To Pin! So you can come back and make these DIY Dollar Tree Wooden Bead Pumpkins!

It is the responsibility of the Reader to assure the products or ingredients they use in any recipes from Kimspireddiy are allergen-free, sugar free, gluten-free, egg-free and/or dairy-free, for example) Weight Watcher friendly, Keto friendly or Vegetarian friendly. Kimspireddiy assumes no liability for inaccuracies or misstatement about products, nutrition, points, opinions or comments on this site. Even though nutritional information is given it is the readers responsibility to calculate points, net carbs & nutritional information. KimspiredDIY holds no responsibility for calculations.
