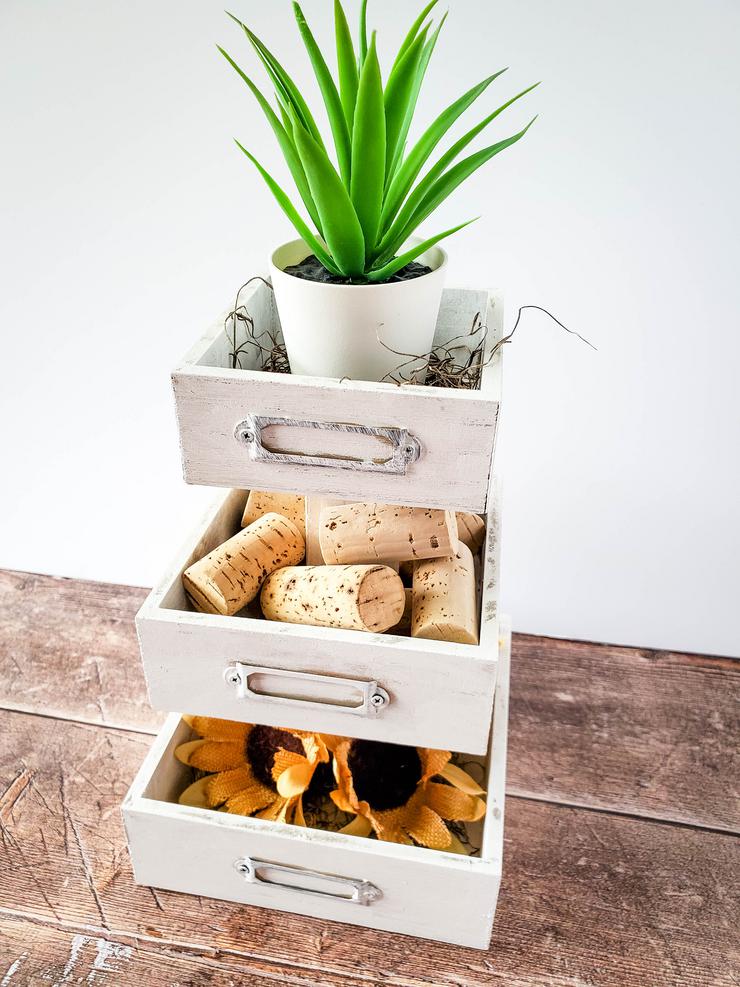
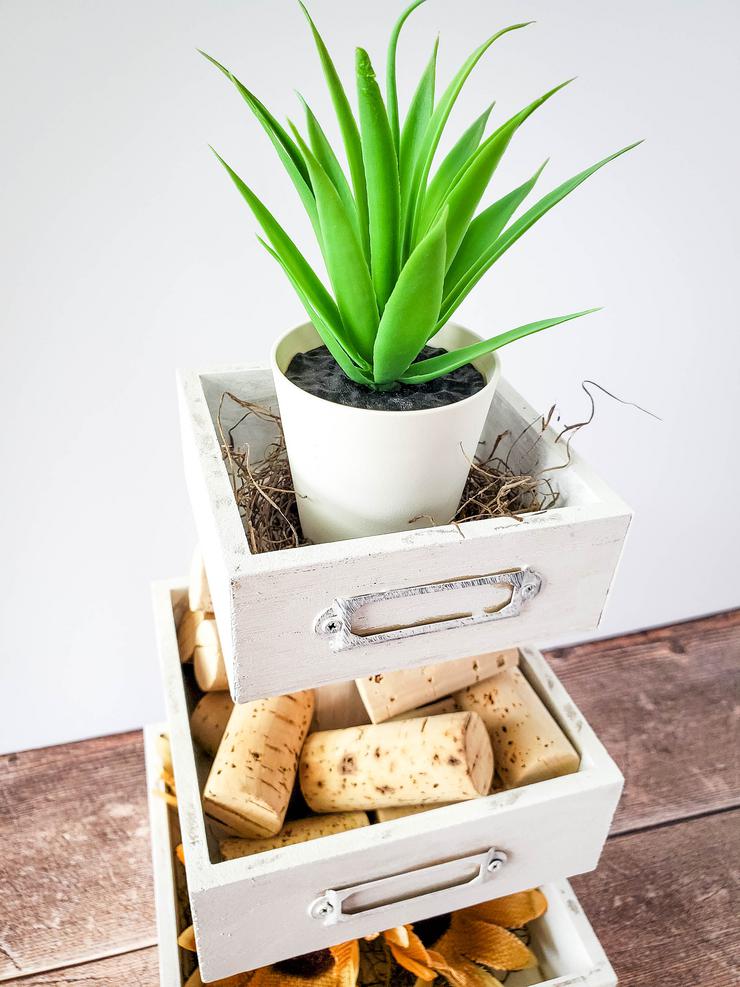
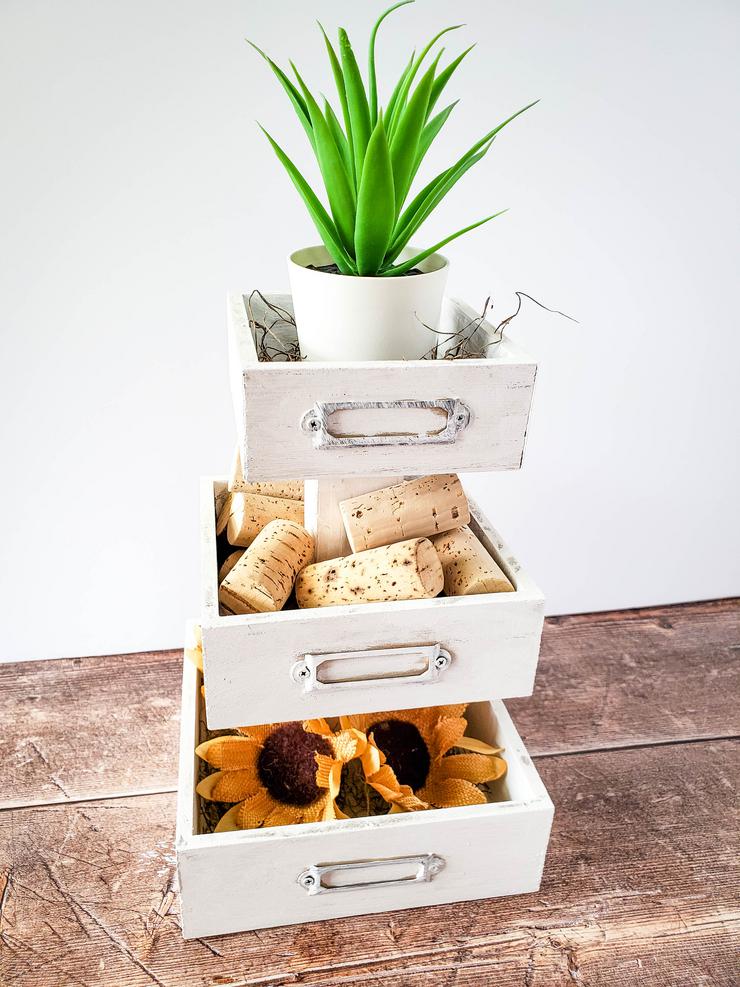
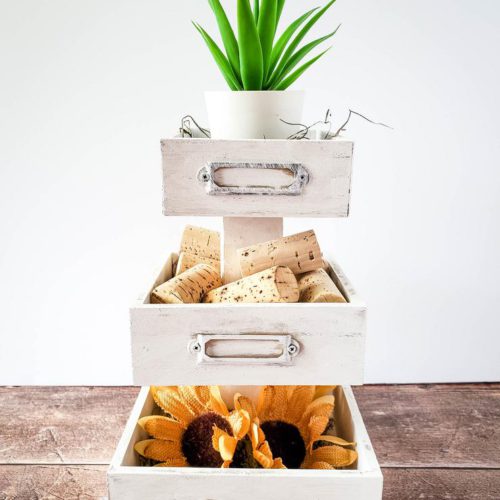
DIY Dollar Tree Farmhouse Stacking Tray

Get ready to craft up the cutest DIY Dollar Tree farmhouse stacking trays.
This Dollar Store DIY when give your home the farmhouse look on a budget.
Super easy Dollar Tree three tiered tray craft project you can make today.
This Dollar Tree hack uses wooden boxes from the Dollar Store.
DIY tiered tray decor that is cheap and super cute.
If you are looking for the farmhouse look in your home then this is the DIY Dollar Tree craft project for you.
You can’t go wrong with these handmade stacking trays.
Get ready to make the best DIY Dollar Tree farmhouse stacking trays.

![]()
Check out these other
DIY Dollar Tree Farmhouse Crafts
DIY Dollar Store Farmhouse Decoration Ideas & Hacks
DIY Dollar Store Farmhouse Decorations
DIY Dollar Tree Farmhouse Tiered Tray
DIY Dollar Tree Farmhouse Egg Wreath
DIY Dollar Tree Farmhouse Rabbit Topiary
DIY Dollar Tree Farmhouse Wagon
DIY Dollar Tree Farmhouse Cricut Mini Book Stack
How to Make DIY Dollar Tree Farmhouse Stacking Tray
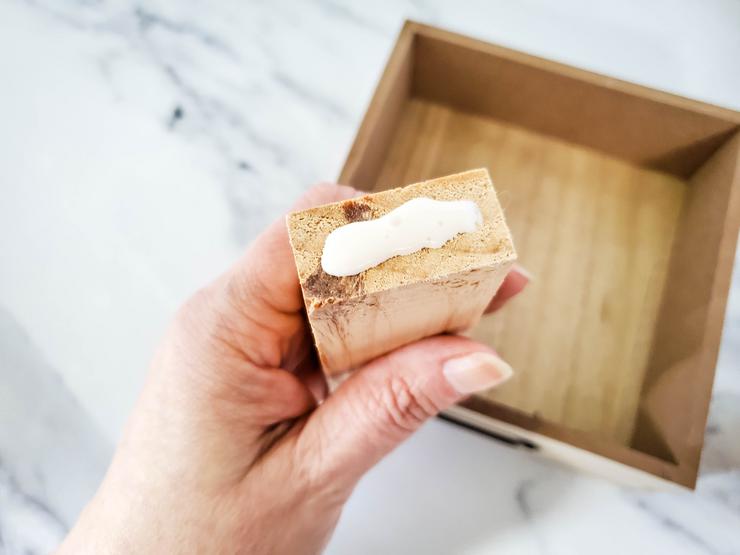
Cut the chunky slat in half using a saw.

Apply wood glue to one end of one of the cut pieces of chunky slat.
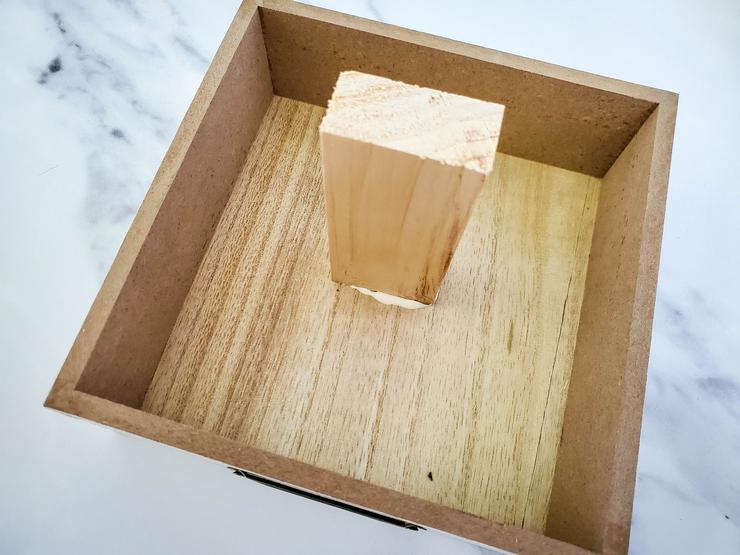
Set it in the middle of the inside of the largest decorative box, and hold for a minute to help secure it.
Apply glue to the top of the chunky slat that you just glued down.
Center the middle size decorative box on top of the chunky slat.
Gently press down to allow the glue to bind.
Apply glue to one end of the remaining half of chunky slat.
Set it in the middle of the inside of the medium sized decorative box, and hold for a minute to secure it.
Apply glue to the top of the chunky slat that you just glued down.
Center the smallest decorative box on top of the chunky slat.
Gently press down to allow the glue to bind.
Allow to glue to set and bid everything together overnight.
Squeeze some white paint out of the bottle onto a paper plate.
Dip the very tip of the fam brush into the paint, and lightly apply paint over the entire structure. 
You do not want a full layer of paint, make sure to paint it lightly, for the white washed effect.
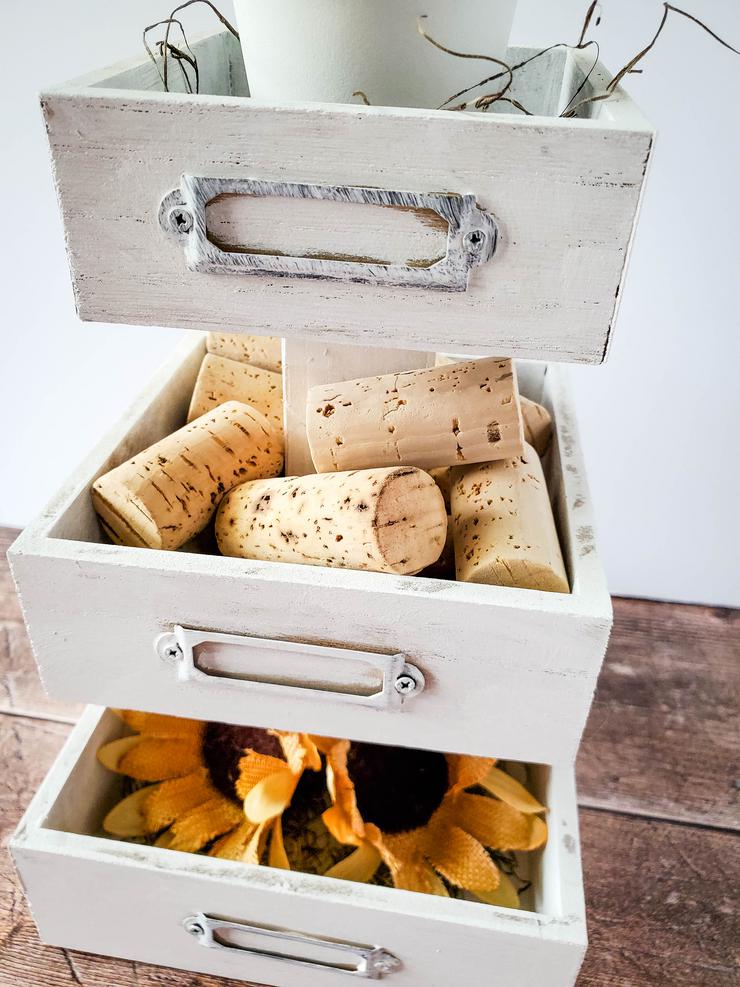
Allow paint to dry, then fill the boxes with decorations.
Please remember to SHARE on Facebook and PIN IT 📌
📌 FOLLOW ME ON PINTEREST BY CLICKING HERE
DIY Dollar Tree Farmhouse Stacking Tray
Ingredients
- Dollar Tree 3 sizes of wooden decorative boxes
- Dollar Tree 12” chunky slat
- Wood glue
- White paint
- Foam brush
Instructions
- Cut the chunky slat in half using a saw.
- Apply wood glue to one end of one of the cut pieces of chunky slat. Set it in the middle of the inside of the largest decorative box, and hold for a minute to help secure it.
- Apply glue to the top of the chunky slat that you just glued down. Center the middle size decorative box on top of the chunky slat. Gently press down to allow the glue to bind.
- Apply glue to one end of the remaining half of chunky slat. Set it in the middle of the inside of the medium sized decorative box, and hold for a minute to secure it.
- Apply glue to the top of the chunky slat that you just glued down. Center the smallest decorative box on top of the chunky slat. Gently press down to allow the glue to bind.
- Allow to glue to set and bid everything together overnight.
- Squeeze some white paint out of the bottle onto a paper plate. Dip the very tip of the fam brush into the paint, and lightly apply paint over the entire structure. You do not want a full layer of paint, make sure to paint it lightly, for the white washed effect.
- Allow paint to dry, then fill the boxes with decorations.
Do Not Forget To Pin! So you can come back and make this DIY Dollar Tree Farmhouse Stacking Tray!

